Showing posts with label pizza. Show all posts

Monday, October 6, 2025

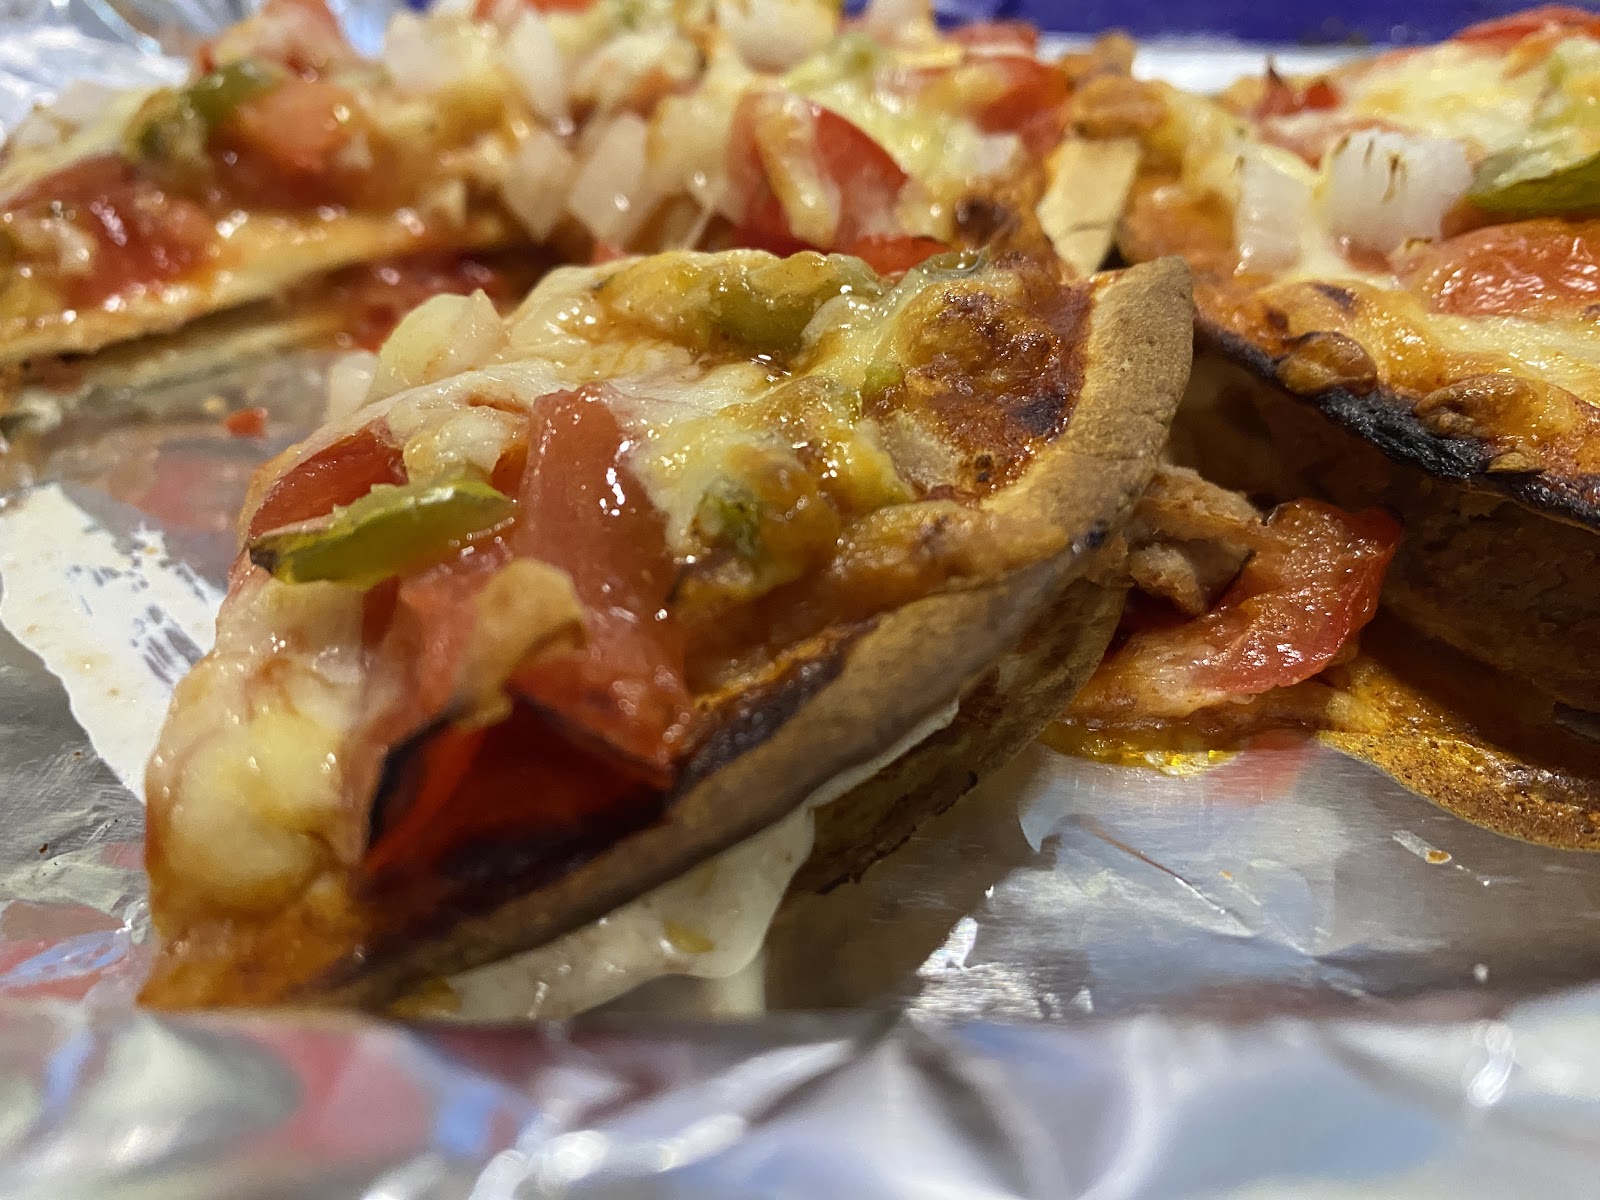
Tiny Meals - Tortilla Pizza


🍕 Tiny Tortilla Pizza — Real Food in a Tiny Way

I’m still in the bariatric stages, and I’ve finally reached the real food part — that exciting (and sometimes intimidating) stage where you start testing what your new stomach can handle. It’s a time of learning, experimenting, and rediscovering food in a whole new way.

Right now, I’m staying protein-forward and working with about 4 oz portions, gradually building up toward 8 oz — or roughly one cup — within the next month. It’s not always easy, but every successful meal feels like a small victory.

I enjoy sharing these moments as I go along — not because I have it all figured out, but because each stage teaches me something new about my body, my relationship with food, and what real nourishment looks like now.


Why I Love This Tiny Meal

There’s something so comforting about pizza — that familiar smell of warm sauce, melted cheese, and crisp edges. But after bariatric surgery, the traditional version doesn’t fit our new reality (literally!).

That’s where this little creation comes in: a single-serve, protein-forward Tiny Tortilla Pizza that brings all the flavor and satisfaction of pizza night — just sized for your current phase. It’s quick, simple, and gentle on your new stomach while still feeling like real food.


🍅 Tiny Tortilla Pizza Recipe


Makes: 1 serving (3.5 ish oz total)
Prep Time: 5 min Cook Time: 5–6 min Total: 10–12 min

Ingredients

  • 2 zero-carb street tortillas (Mission Zero Carb or similar)

  • ¼ cup pizza sauce (or seasoned tomato/spaghetti sauce)

  • ⅛ oz shredded Italian cheese (or mozzarella)

  • 4 slices turkey pepperoni, diced very small (since the pizza is tiny)

  • Optional: finely diced toppings like onion, mushroom, olive, or bell pepper

Instructions

  1. Crisp: Air fry, bake, or toaster bake the two tortillas at 375 °F for 2–3 minutes until lightly crisp — whichever method works best for your setup, since the pizza is tiny.

  2. Layer: Spread a thin coat of sauce and a sprinkle of cheese on one tortilla, top with the second, then spread the rest of the sauce, cheese, and toppings.

  3. Cook: Return to air fryer, oven, or toaster oven for 2–3 minutes until cheese melts and edges brown.

  4. Serve: Let cool a minute; slice or enjoy whole — a compact, high-protein mini pizza.


🔢 Nutrition Estimate (3.5 ish oz total)

NutrientAmount
Calories≈ 135 kcal
Protein≈ 13 g
Carbohydrates≈ 3 g (net 2 g if using zero-carb tortillas)
Fat≈ 7 g
Fiber≈ 1 g
Sodium≈ 420 mg


💡 Bariatric Real Food Note

This recipe is portioned for one — perfect for early real-food stages. As your tolerance and needs increase, preparing two can make a balanced and satisfying meal while keeping the focus on protein and portion awareness.


A Tiny Bite of Normal

When you’re in recovery and craving something that feels like real food, it’s not about giving in — it’s about re-learning balance.

This little pizza is one of those moments where something small brings big joy. It reminds me that healing doesn’t have to mean giving up the things we love; it just means learning new ways to enjoy them.

Each “tiny” meal has its own quiet victory — one bite, one phase, one day at a time.
And through it all, I’m reminded: God is still in the details — even in a 3.5-ounce pizza. 🍕✨

Always and most importantly — thank you to my family and friends for all the love and support that has carried me this far. I will be back in the days ahead. This is just the beginning. 💛

Let’s Connect

Have an idea?
Share it in the comments — I’d love to hear what’s working for you during your different phases 💛

Till we meet again

love and find joy in your day 

Louise

Friday, April 18, 2025

Sour Dough Discard - Pizza Edition - Come Back to Eating at Home


Happy Easter, Happy Spring, Happy Lent, Happy Passover.

I hope that included us all. 

I have been religiously tending to a sour dough starter. There are weeks I may keep her in the fridge and then there are times, I feed her daily. I seem to not be able to time myself to make a complete sour dough loaf. I have tried a few times and they turned out great. With my time line however the discard is my favorite part.

Sometimes, I will let it collect, so that I can make more of things with it.

Today I did not, I made a pan pizza. Straight from the discard.

Taking a skillet, mine was non-stick, note, I have seen it done, in a hot cast iron and put into the oven. I chose to try it this way. It worked and was so delicious and super easy.

My pizza today, was Greek inspired, I only used feta, mozzarella cheese and canned mushrooms. Next time if I have on hand it will be some spinach, onion and some Greek olives. Yum, right.

I do not use a base sauce, preference is just because, I like to put either a laughing cow spread on it, or today, I just sprinkled a little mozzarella cheese.

So let's get to it.

Sour Dough Discard - Pizza Edition

Greek Inspired

Stuff to gather:

Sour Dough discard (as much as you want to use as a pizza, my pan was 8 inches) 

Olive oil (enough to coat bottom of pan)

Mozzarella Cheese (this gave it light base of cheese flavor, so the feta stood out and the seasonings)

Feta Cheese

Mushrooms 

Seasoning (  I used the Cavendar's Greek low salt seasoning. )

*optional toppings to complete the Greek theme, kalamata olives, spinach, onion, and even wait and make a Greek inspired salad and put a little on the warm pizza slice. 

The putting together:

1. Put oil in the pan, making sure it all gets covered.

2. Pour in your discard, when I did mine the oil made it easier to spread out. 

3. Start with the cooking on low, like a pancake, then I waited for a few bubbles, then flip.

4. Put a slight sprinkle of cheese (or if you prefer a sauce, you could spread a little alfredo if you like)

5. Then your toppings. Seasoning. Cover for a few minutes, it helped my top melt and warm through. then Uncover to finish crisping up the bottom. 

  *at this point if your pan is oven proof I guess you could do that to melt the top more, but I found covering was just enough.

6. Check your bottom, and it will start to brown, and get nicely crispy.


This was so fast, and so yummy. Just what I was craving. I love the taste of the Sour Dough, it makes a slightly tangy note. 


As I was flipping this, I realized this could be really versatile, this could have been a nice wrap for a Greek Gyro, or a chicken shawarma wrap. So ideas for the future.

I am trying to commit to sharing at least once a week, keeps me grounded and actually keeps us as a family committed to eating better and eating at home. 

My wish for you is to always find a way to live your best life.

 If you try this always feel free to drop a comment, I would love to have your feedback.

Also if you have a craving, send it in a comment and I will see what I can figure out for us to try.

Thanks again for being part of my community.

Be the Light in Someone's Day

Be back soon. 


Friday, March 21, 2025

Tortilla Mexican Pizza - Make It Better At Home Series - #1


Hello out there.

Been awhile, but I am going to try to get better at being more constant. Please if you would like bookmark me, you can check in on me and see what is up. I would love to see you. Welcome to My Kitchen. 

I thought maybe this would be an interesting series to start. With how much fast food is these days, even sitting in a restaurant for dining. Looking for a craving. Looking for a cleaner approach to that. Or just not wanting to leave or deliver. 

Now these are not exact tastes of these places, but I found them to be quite good. I found them to be filling and clean tasting. Found them even more affordable. This one in particular I had everything in the pantry. 

To start off this series, I will be doing -

"Tortilla Mexican Pizza " a play on the Taco Bell


"Tortilla Mexican Pizza"

Stuff To Gather:

~ Tortillas - 

*depending on the size you would like, you can use. I used my air fryer to make it quicker, but you can do it in the oven, just time consuming.

~ Refried Beans 

*If you want you can also just take a can of black, pinto and drain and smash, add some seasoning and you have the same thing. 

~ Enchilada Sauce

*Also here you can just take tomato sauce, and put in a little of your favorite sauce for tacos.

~ Shredded Cheese - 

*Use cheddar or pepper-jake

~ Tomato - diced small

*here you could just use some salsa. Mix it into your enchilada sauce or the tomato/hot sauce

~ Onion - diced small

~ Jalapeno's - if you like them

~ Of course you can finish after it cooks with shredded lettuce, and sour cream, that is up to you. 

The Putting Together:

1. Take two tortilla's and lay in the air fryer. 390 for around 2-3 minutes - check 

*I lay a piece of foil under mine 

*be sure to spray the fryer so they do not stick. Also they fly around in the Air Fryer and you will need to put something a little heavy to hold it down. I have a small rack from an Air Fryer I had years ago. What also works is a small canning ring on each one. 

2. Air Fry until they get nice and crunchy and brown.

3. Take one tortilla and place back where you cooked it on. 

*make sure you spray what you are making it on to put back in

4. Start with the refried beans. Smear a nice layer onto one of the tortilla's.

5. Sprinkle a little cheese, and if you like a little onion.

6.  Place second tortilla on top. 

7. Take your enchilada, or the sauce you made and smear on top, like a pizza sauce.

8. Put your toppings you like, the onion, the salsa, or tomatoes. 

9. Finish with your cheese on top.

10. Put back in air fryer and cook at 390 for around 6 minutes (you check and see if it is melting)

Please be careful when you get it out, it is a little hot.

Put a little sour cream, hot sauce, what ever you like.

This was my lunch today.  I was craving a Mexican pizza. So I thought maybe I share it with you.


If you try this always feel free to drop a comment, I would love to have your feedback.

Also if you have a craving, send it in a comment and I will see what I can figure out for us to try.

Thanks again for being part of my community.

Be the Light in Someone's Day

From My Kitchen to Yours.

Much Love

Louise 


Thursday, May 6, 2021

Crustless Pizza


Hey Ya

In the mood to change things up. I every now and again, make this crust less pizza.

It is Low Carb, Keto friendly. The entire 10 inch gave me 6 net carb /26 protein /449 calories. You could eat half and be very full.

I tried to make it WW blue friendly and to be truthful it is worth the 10 points. I will elaborate on that under the WW Blue Notes

So let's get started.

The Menu

Crustless Pizza

The Players:

1/4 cup of shredded cheddar cheese

1/8 cup of shredded parmasean cheese

1/3 cup of shredded queso cheese

4 slices of blacklabel precooked bacon 

**any toppings, just make sure they are diced small.

The game:

Take a large flat pan (10-12 inches atleast)

Spray with non stick aresol

Sprinkle the cheeses evenly over the bottom, kinda grouping so you wont have any holes.

Put on toppings.

Turn on the heat and start to melt the cheese, go around with a spatula and clean up the edges, I slighty push in towards the middle, to make it look pizza like. 

Cook medium and keep watch, pick up the edge every now and again to see how brown it is getting.


When you get it to a good brown. Turn off and put to the side.


Wait about 5 minutes and then slip a spatula under to loosen up and it should slide right onto a plate.

The longer it cools the crunchier it gets.


WW Blue Notes

For the WW plan I used a combination of cheese to make it taste good, especially using a lower fat cheese. You can also add more stuff on top, like any 0 point veggies, (just dice them very small so they will cook) You could also cut back on the bacon to save a few points. I ate the entire thing, but you could share it. It made a 10 inch pie. It is also very filling.

You should try this and let me know.

#makingregularfoodworkonww

Have a great day. Hope to see you soon with more of what I have to share. Subscribe with your email and you can keep up with what I am doing. If you try it, leave a comment, would love to know what you think.

Until then....


Living your best life and doing what feels good for you is the secret.
Keep it simple, Stay well and safe. 

Louise


Just sharing some quick meal ideas, Used AI to make it look simple

  These I created because you can keep it all separated until you want to create that portions. Almost like a meal prep in pieces.  This is ...